 Loading... Please wait...
- 727-541-5900
- My Account
Currency Displayed in
- Home
- Resource Center
- How to Check Your AED
- Philips HeartStart FR2 Maintenance
Philips HeartStart FR2 Maintenance
Philips HeartStart FR2 Maintenance
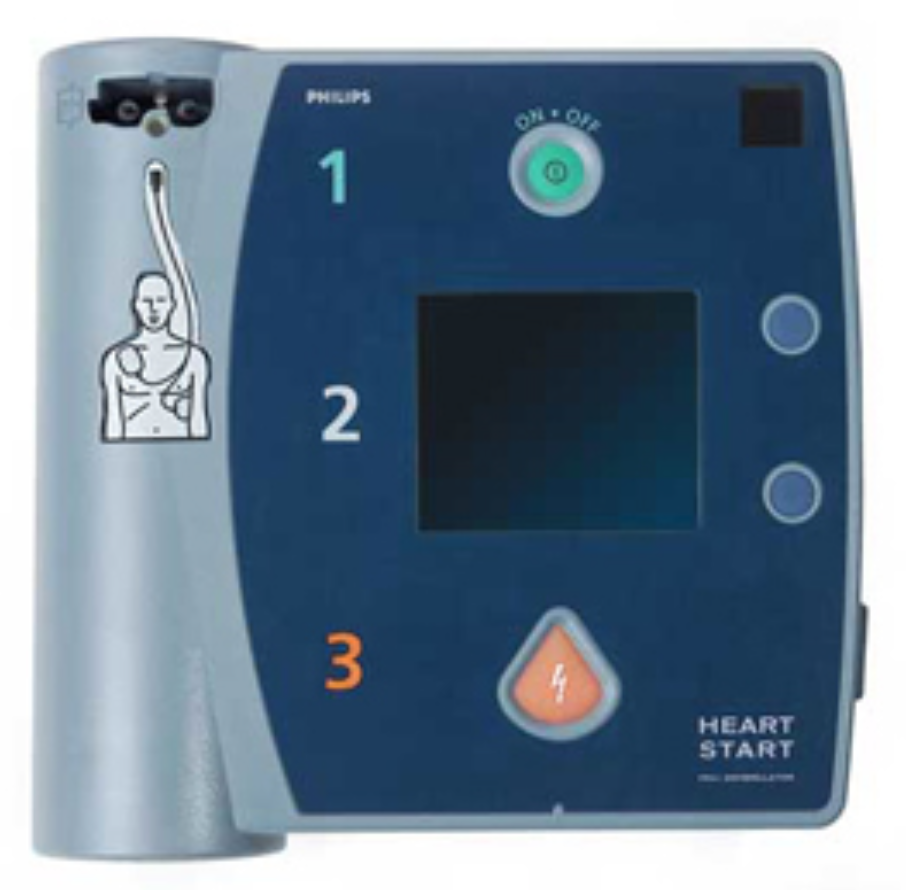
How to check your Philips HeartStart FR2 Defibrillator
Maintaining your FR2 AED is a very important task that is made up from a few easy steps that are necessary to make sure that your AED is in working order when you need it. It is imperative that you not miss a single step when checking your AED, so we made a list for you.
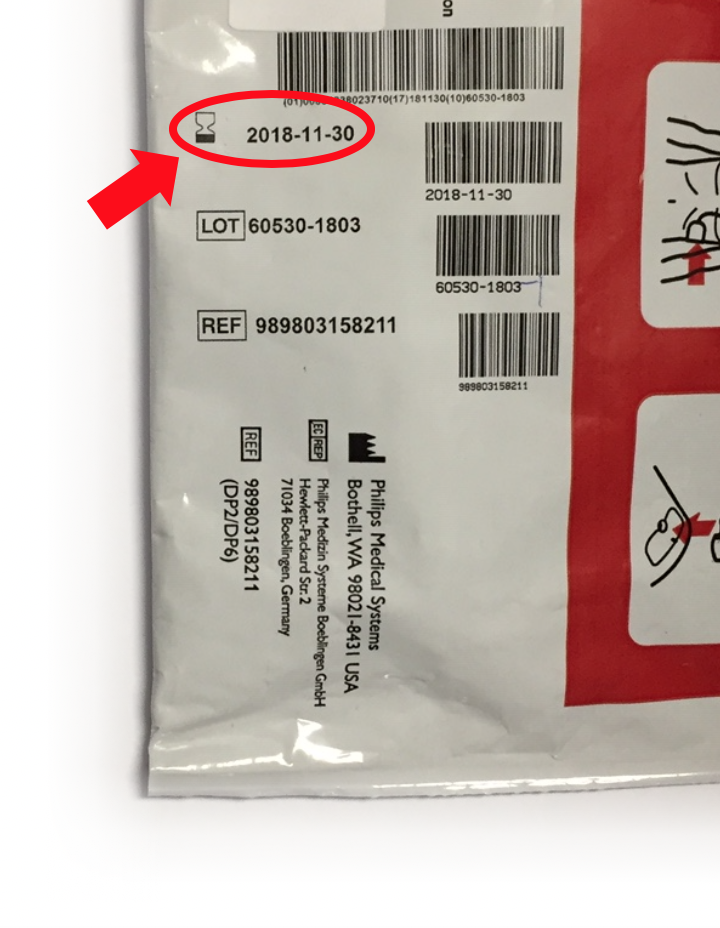
1. Check your pads.
Make sure that your electrode pads are not plugged in to the AED and that they remain in their sealed packaging. Check to ensure that the pads have not aged past the expiration date marked on the outside of the package. Replacement pads can be ordered here.
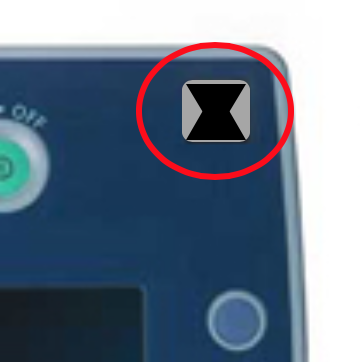
2. Check the status indicator.
The FR2 is ready for use if you see the black flashing hourglass. If anything is indicated besides the black hourglass (red X, blank, etc.), then remove and reinstall the battery to run the selftest. Make sure that the pads are not connected to the AED when trying to run the selftest. If the indicator still does not show the flashing black hourglass or if a LOW BATTERY or REPLACE BATTERY message is displayed, install a new battery and run the selftest. If it fails again, contact Philips Medical Systems.
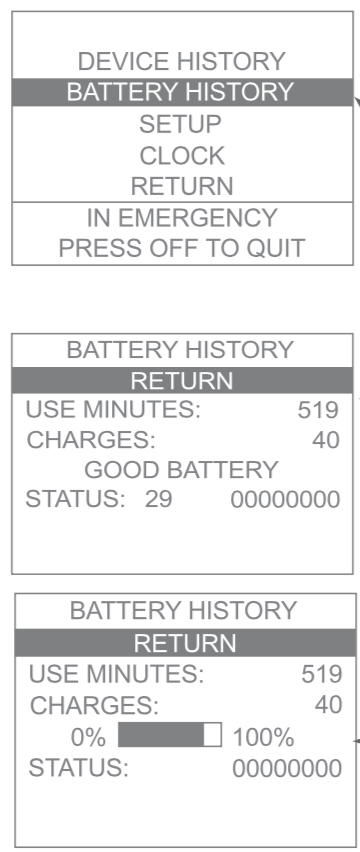
3. Check battery life.
Select NEXT from the menu screen displayed when you insert the battery, then select BATTERY HISTORY from the next menu displayed. The battery history information is read from the internal memory of the battery. It includes:
- USE MINUTES - The total operating time (in minutes), including selftest time, for this battery.
- CHARGES - The total number of full defibrillation charges that have been provided by this battery, including selftest charges.
- BATTERY READINESS - a GOOD BATTERY message (M3863A) or a fuel gauge display (M3848A) showing 25%, 50%, 75%, or 100% or a LOW BATTERY or REPLACE BATTERY message, as appropriate.
4. Check internal clock settings.
The internal clock should be set to the current date and time. This setting allows for an accurate internal accounting of when the AED is used. Select NEXT from the menu screen displayed when you insert the battery, then select CLOCK from the next menu displayed. Adjust the date and time settings at the bottom of the screen accordingly.
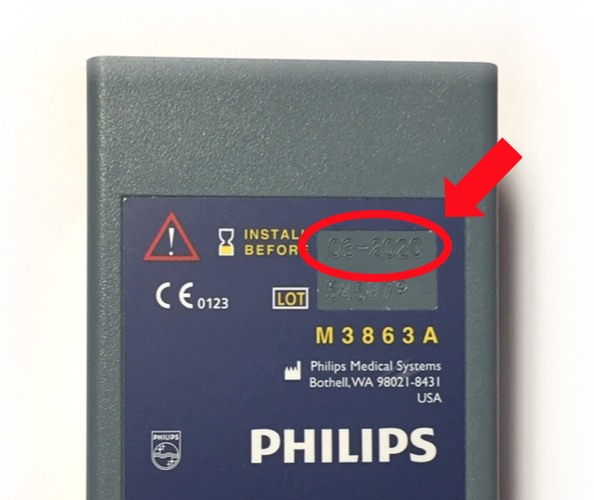
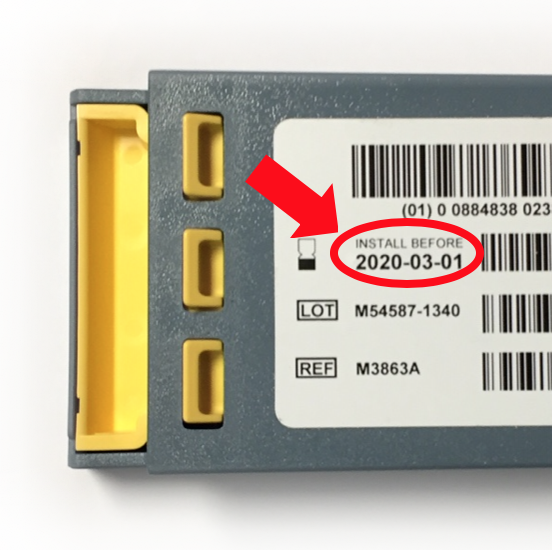 5. Check the install before date on your spare battery.
If you have a spare battery, check the install before date that can be found on both sides of the battery. It is located on the top-right of the front and on the left side of the label on the rear of the battery. If the date has expired then the battery should be replaced. A replacement can be found here.
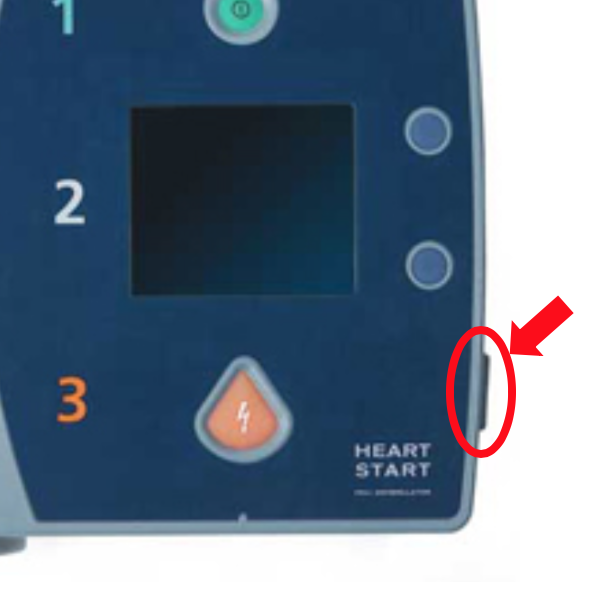
6. Make sure the Data Card is present.
The data card can be located on the right side of the AED and can be removed via the pull tab extending from it. The data card should always be inserted into the AED. If you are missing a Data Card then a new one can be ordered here.
7. Check any other emergency supplies stored with your defibrillator
If you have a first aid or fast response kit, inspect the kit to make sure all contents are accounted for and are in working order.
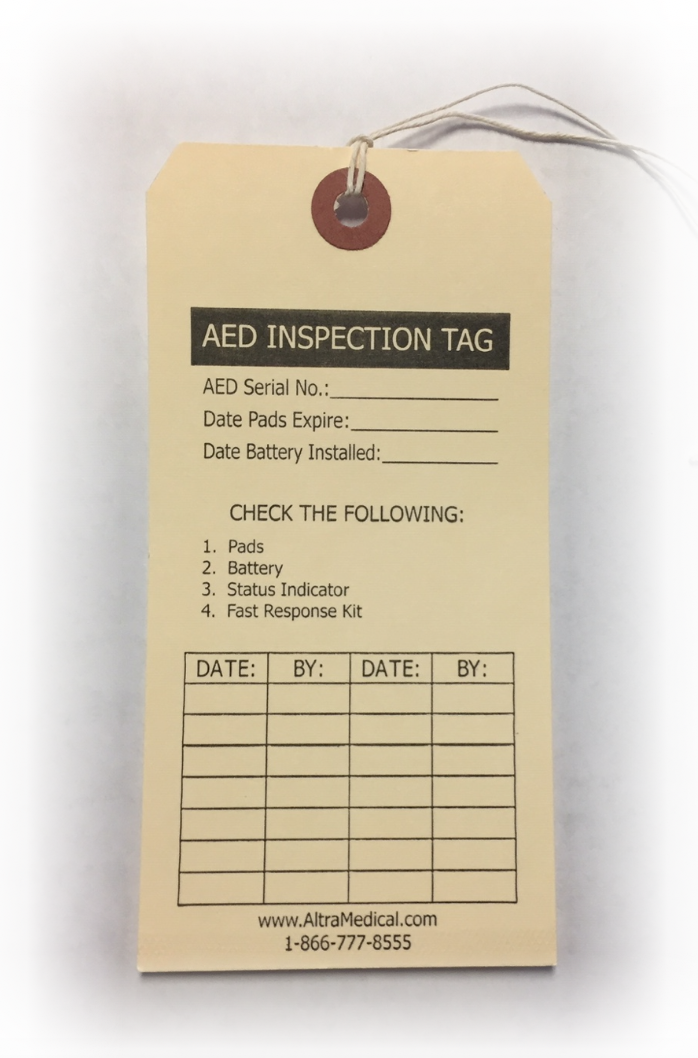
8. Record your inspection on your AED Inspection Tag.
The inspection tag helps maintain records of previous inspections as well as displaying when your pads and batteries expire. If you are in need of a maintenance tag then please contact us. We can provide 1 or 2 tags for free or 10 tags for $1.
